# Process
A process is a predefined workflow that represents a series of steps to achieve a specific goal. Processes help standardize and automate repetitive tasks, ensuring consistency and efficiency in your business operations.
# List Process
- Go to the "Processes" section in the left menu.

- You will see a list of all processes that has been created in the application.
- The list provides essential information about each process, such as the name, Version, Status, Processing time, Workspace etc.
Actioncolumn shows allowed actions for each user as per assigned roles.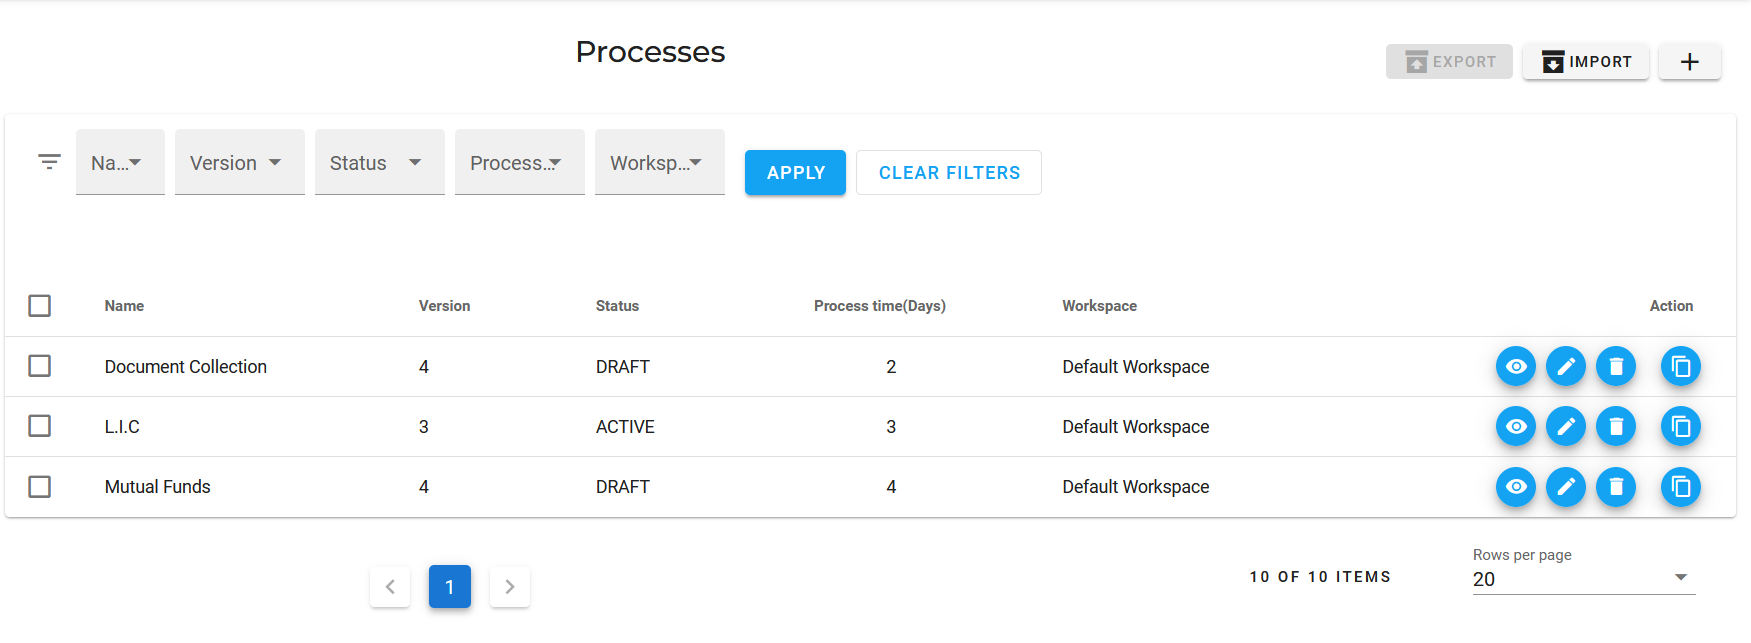
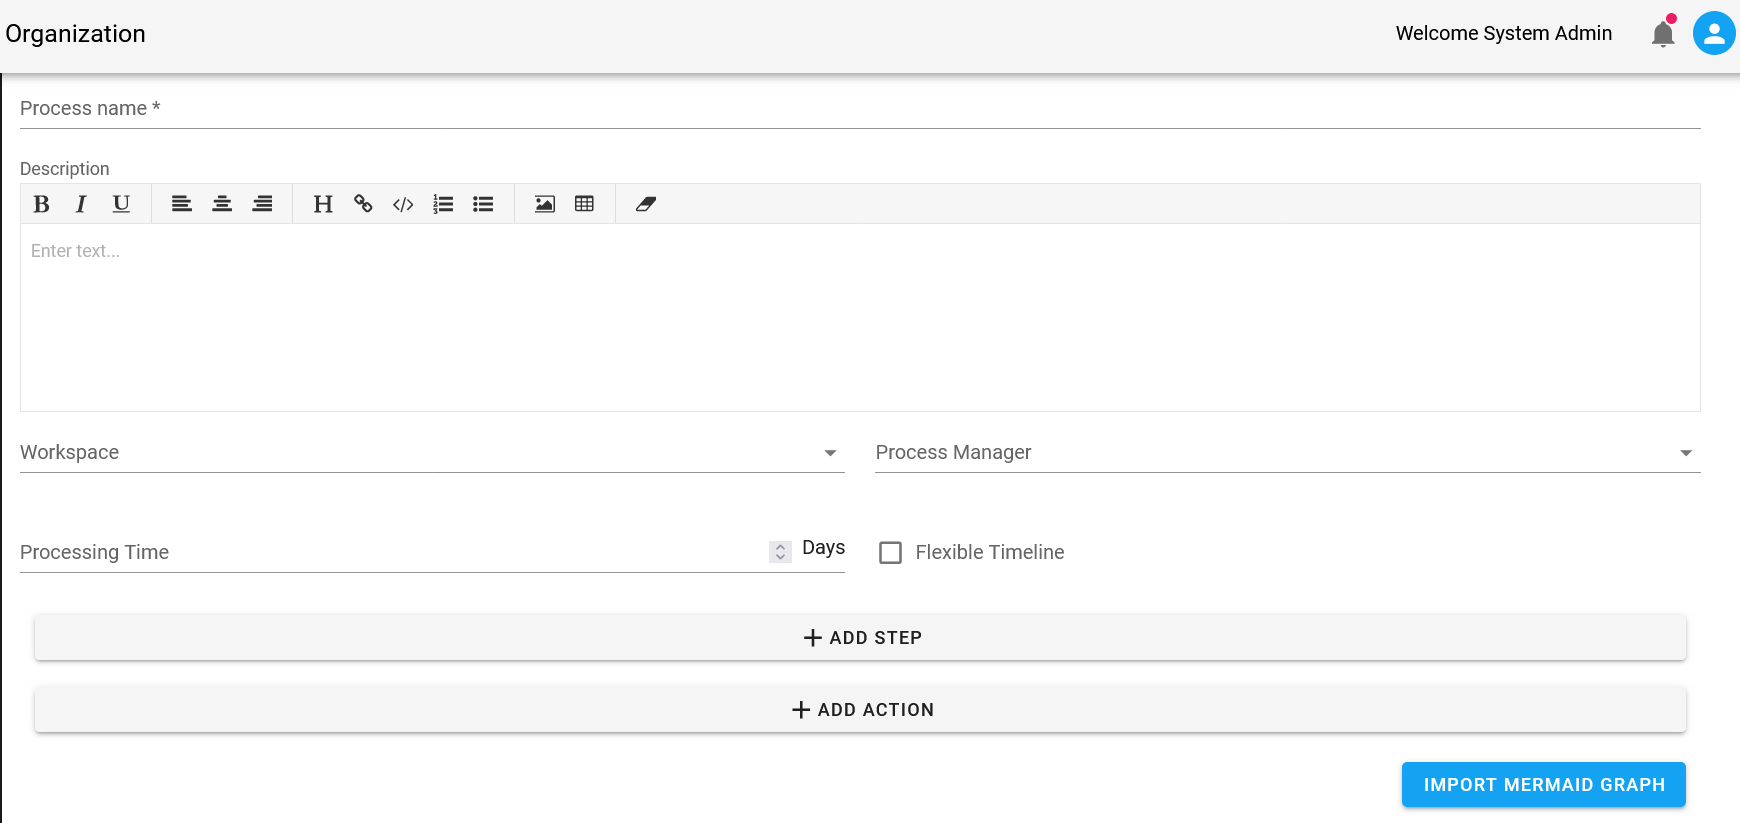
# Create Process
Login to the EasyProcess application using your credentials.
Navigate to the "Processes" section in the left menu.
Click on the button to "Create New Process".
Process name: Provide a meaningful and descriptive name for the process. This will help you easily identify the process later.
Description (Optional): Provide some additional information about the process in description.
Workspace (Optional): workspace allows the segregation of processes based on departments or teams.
Process Manager (Optional): Process Manager is the person who is responsible to get this process completed.
Processing Time: Time(Day/s) in which the process needs to be completed.
Flexible Timeline: This flag influences how EasyProcess manages the operation expiryDate. By default, this attribute is set to false. When activated by setting it to true, the system checks whether the actionDate/dueDate of the next task occurs after the operation's current expiryDate. If this condition is met, the operation's expiryDate is adjusted to match the dueDate of the next task.
Add Step: Create Steps that need to be completed during the process execution.
 .
.
To know more about Step creation please refer hereAdd Action: Action needed to complete the given step(task).
 .
.
To know more about Action creation please refer here
# Update Process
- Go to the "Processes" section in the left menu.
- Locate the Process you want to update from the list of existing processes.
- Click on the icon to update the process details.
- Make the necessary changes to the process information.
Note: ExceptWorkspaceyou can modify all the fields in the process. - Click on the "Submit" button to apply the changes to the process.
# Delete Process
- Navigate to the "Processes" section in the left menu.
- Find the process you wish to delete from the list of existing processes.
- Click on the icon button to delete the process you want to remove.
- A confirmation prompt will appear asking you to confirm the deletion.
- Click "OK" to delete the process. Please note that this action is irreversible.
# View Process Details
Navigate to the "Processes" section in the left menu.
Locate the process you want to view from the list of existing processes.
Click on the to access the detailed view of the process.
In the detailed view, you can see additional information related to the process.
-You can Activate/De-activate the process from this page.
-All the versions of selected processes can be accessed.
-A detailed diagram of the process is shown.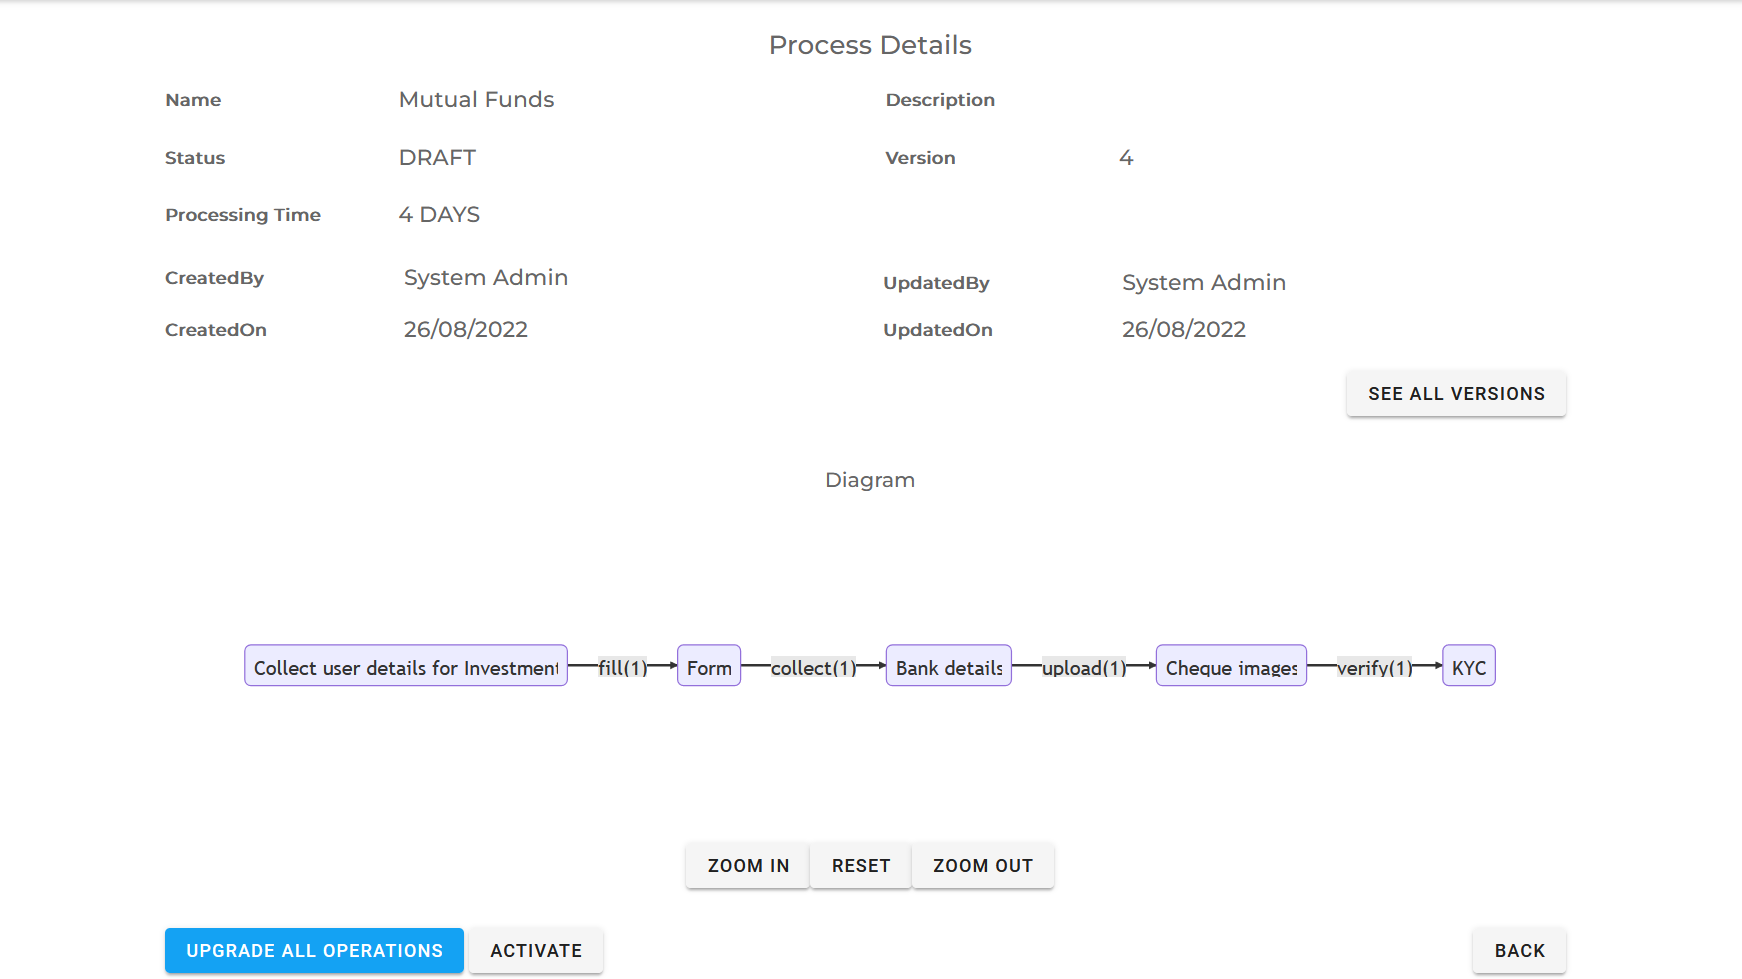
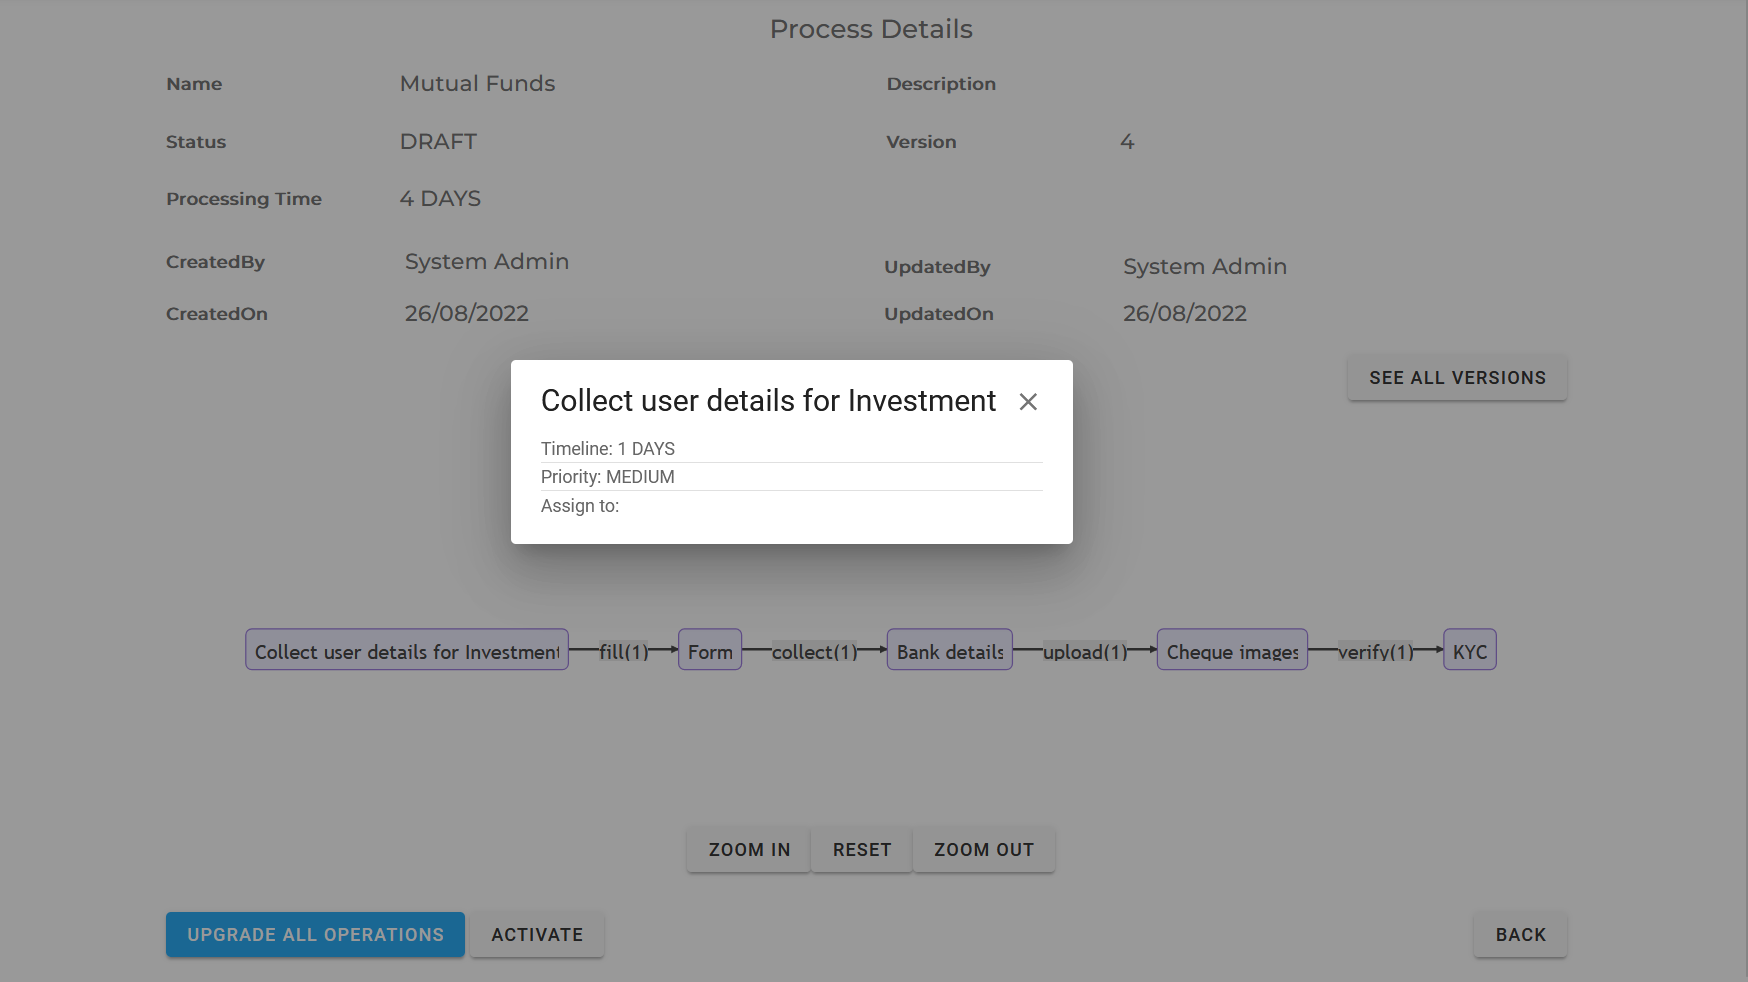
Click on any step in the diagram to show additional information about the step.
# Create Step for process

- Name: Provide a meaningful and descriptive name for the step. This will help you easily identify the step later.
- Description (Optional): Provide some additional information about the step in description.
- Start step: Specify whether the step is the start step.
- End Step: Specify whether the step is the end step.
- Assign Employee (Optional): Choose an employee to whom this task should be assigned.
- Assign Group (Optional): Select a group for task assignment. (Use this option when tasks need to be distributed among group members).
- Type: Select appropriate :
TASKorMEETING.TASKis default value. - Sequence: In a Kanban view, a sequence number determines the position of a step/column to be displayed.
- Priority: Select appropriate :
HIGH,MEDIUMorLOW.MEDIUMis default value. - Turn Around time number: Specify the time in which the task needs to be completed.
- MINS or DAYS: Select appropriate
MINSorDAYS.DAYSis default Value. - Click on the "Submit" button to apply the changes to the step.
# Update step
- Go to the "Processes" section in the left menu.
- Locate the Process you want to update the step for, from the list of existing processes.
- Click on the icon to update the process details.
- Click on the step name.
- Make the necessary changes to the step information.
- Click on the "Submit" button to apply the changes to the step.
# Delete Step
- Navigate to the "Processes" section in the left menu.
- Locate the Process you want to delete the step for, from the list of existing processes.
- Click on the icon button to delete the step you want to remove.
- Please note that this action is irreversible.
# Create Action for step
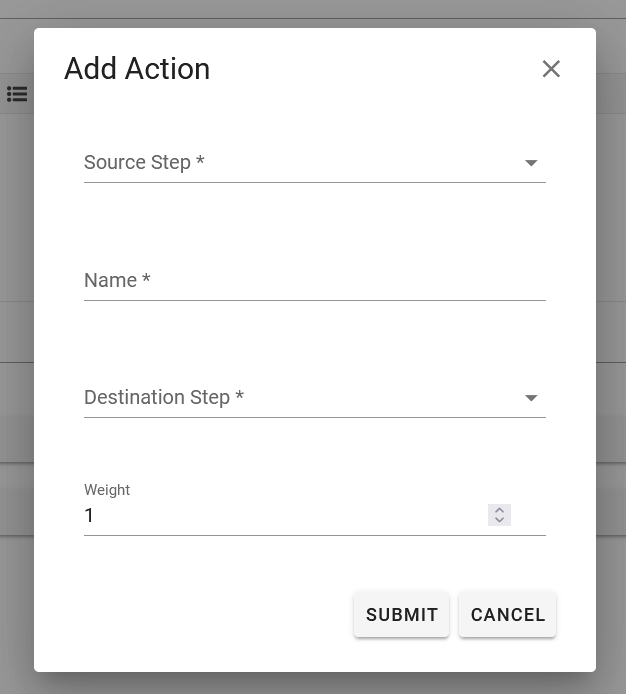
- Source Step: Select the step you want action from.
- Name: Provide a meaningful and descriptive name for the action. This will help you easily identify the action later.
- Destination Step: Select the next step after action is completed.
- Weight: Select the weight for the action.
- Click on the "Submit" button to apply the changes to the action.
# Update Action
- Go to the "Processes" section in the left menu.
- Locate the Process you want to update the action for, from the list of existing processes.
- Click on the icon to update the process details.
- Click on the action name.
- Make the necessary changes to the action information.
- Click on the "Submit" button to apply the changes to the action.
# Delete Action
- Navigate to the "Processes" section in the left menu.
- Locate the Process you want to delete the action for, from the list of existing processes.
- Click on the icon button to delete the action you want to remove.
- Please note that this action is irreversible.